- How to create a collection in Postman?
- In how many ways, we can create a collection in Postman?
- How to make a collection as Favourite in Postman?
- How to save a request in Postman?
- In how many ways, we can save a request in Postman?
A Postman collection allows you to group individual pre-built requests together. You can further group by creating folders with in a Collection for better categorisation. For example:- Grouping APIs based on functionality(Folders) and keeping them together in a Collection.
You can read more about Postman Collections here.
There are multiple ways to start creating a Collection in Postman:-
- Click on File – > New -> Choose Collection.

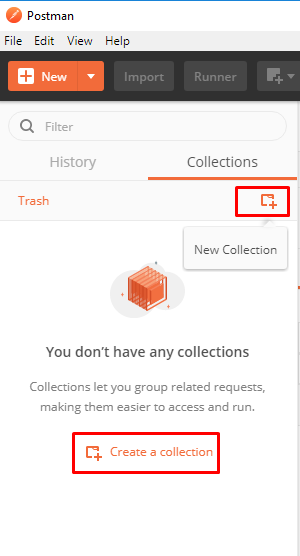
2. Click on “Collections” tab on Sidebar (Left Hand Side). Click on “New Collection” icon.
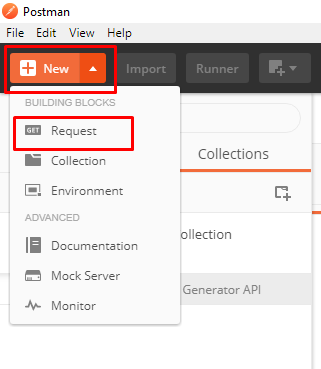
3. Click on down arrow icon beside “New” button and select Collection:-

4. Click directly on New button. It will open “Launch Screen”. Select “Collection” from it.

5. Navigate to Request builder and Click on Save – > Save as – > Create Collection . This is useful to save a request in a new collection or existing collection.
If you use any way mentioned above except last one , you will get below screen. For the last way, you need to create a Collection first and then you need to edit it. Once you launch in edit mode, you will get same screen as below.

You will see multiple tabs there. It is very important to understand usage of each tab. We will see them in details later.
To create a Collection, only “Name” field is mandatory field. You can give a meaningful name to Collection and click on “Create” button.

You will see created collection in Sidebar:-

Since, we have not added any request to Collection, it shows “0 requests”.
Mouse hover on Collection name. You will see three options as highlighted in pic:-

“Asterisk” icon is to mark collection as Favorite which is shown on top always in workspace. When multiple asterisk marked collections are present, it will be sorted based on name.
Remaining two options we will see in upcoming posts.
Postman provides you multiple ways to add a new or existing request in to an existing collection or create and save into a new collection.
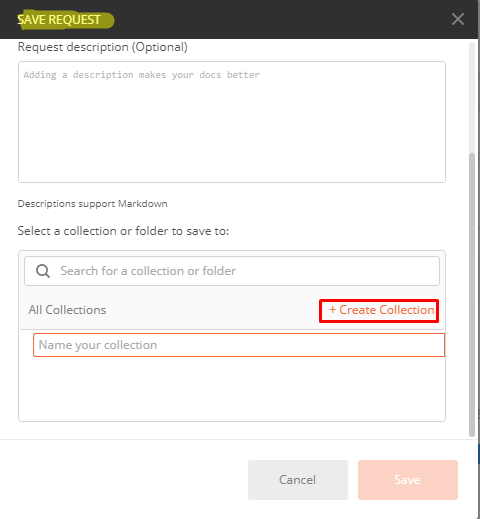
- Create a request in request builder and click on Save -> Save as.

Give a meaningful name and description to request and search for a collection or folder to save. It will show available collections/folders when you enter name. When you select a desired collection or folder, “Save to ” will be shown as shown above.

After clicking of Save button, you will see request is added in to collection.

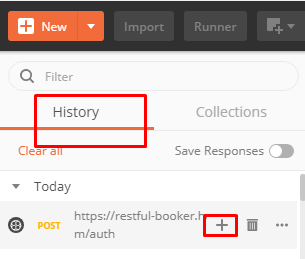
2. You can also add an existing request to a collection from “History” tab. History tabs shows all the requests which were hit. Mouse hover on any request , you will see ‘+’ icon. Click on plus icon to save that request in to a Collection.
History tab shows request categorised by date. If you mouse hover on date, you will see a plus icon. You can use that to add all request of that day to a collection.
Above we added an existing request to collection. You can add a new request in to a collection as well.
3. Click on “…” icon while hovering on Collection name in sidebar.

4. Another way is from “New” button. It will ask you to give a name to request and save in to a collection (Optional step).
Don’t confuse or worry. When you start practising, you will remember.
More about API Testing in upcoming posts. Stay tuned.
If you have any doubt, feel free to comment below.If you like my posts, please like, comment, share and subscribe.#ThanksForReading
#HappyApiTesting