Earlier when we used to perform any git actions such as pushing code from the local repository to a GitHub repository then we needed to pass our username and password to authenticate the action. But now GitHub has removed Support for password authentication since August 2021. Now we need to use a GitHub Personal Access Token (PAT) instead of the password.
Let’s learn step by step process to push code from the local repo in Eclipse to GitHub using GitHub Personal Access Token (PAT).
Give a proper repository name. You can select either public or private. If you are a beginner in Git then do a similar setup as shown below.
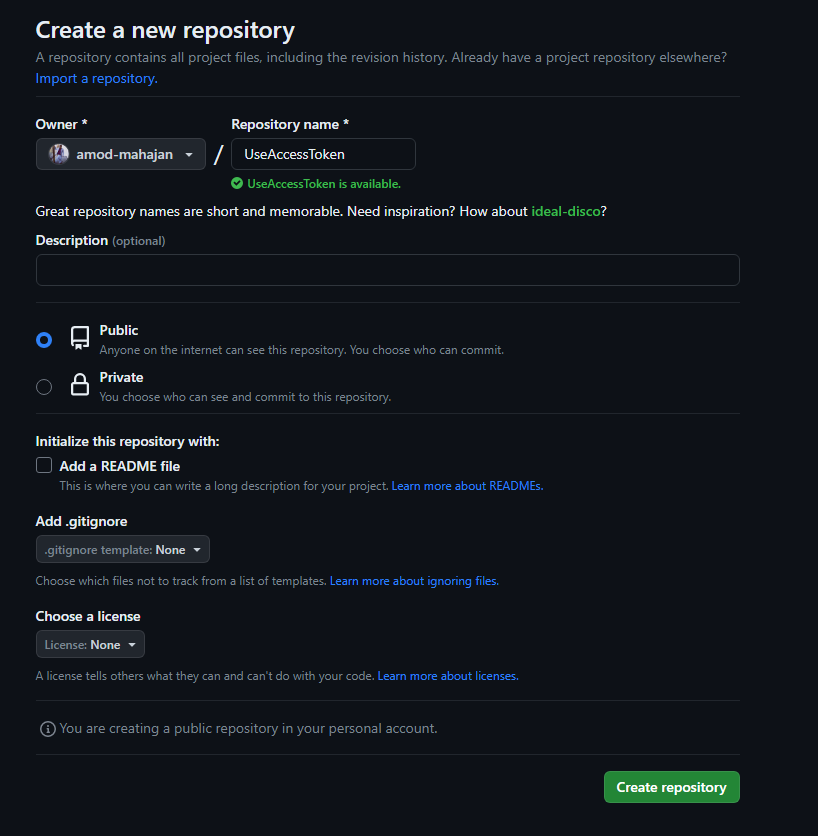
Click on the “Create repository” button to complete the creation of the new repo. You can see the URL for the new repository in the below image – https://github.com/amod-mahajan/UseAccessToken.git

I will use Eclipse IDE to create a basic Java project with a simple Hello World program.

Right-click on Project -> Team -> Share Project

Check the “Use or create repository in parent folder of project” checkbox. Then select the Project Name and click on the “Create Repository” button.

Click on the “Finish” button.

Perform Right-click on Project -> Team -> Commit

Drag a file/s from “Unstaged Changes” to “Staged Changes“. Give a meaningful commit message and click on the “Commit” button.

Perform Right-click on Project -> Team -> Remote -> Push

Copy and paste GitHub URL in the URI field as shown below. Values for the Host and Repository path will be auto-populated. Click on the Next button.

Select the Source ref as the master branch i.e. default branch. Destination ref will be automatically populated.

After that click on “Add Spec” button.

Click on the “Finish” button.

At this stage, you will be asked to provide login credentials for your GitHub account. Now you can not use the actual password of your GitHub account here. We need to generate a Personal Access token for our GitHub account. Follow the steps below.
Click on the Profile icon at the right top corner and click on “Settings“.

Scroll down all the way and click on Developer settings.

You will see “Personal access tokens” as shown below.

There are two types of tokes.
- Fine-grained tokens – It is in the Beta stage as of now. It is a repository-scoped token.
- Tokens (classic) – It is not repository-scoped. A generated token can be used for any of your GitHub repositories.
We will use a classic token for this post. Select “Tokens(classic)” and Click on “Generate new token“.

Now you need to provide the value of “Note” and select Scope. The scope is to define the actions which can be performed with a token. You can choose any value for Expiration as required. After all these steps, scroll all the way down and click on the “Generate token” button.

You will see a token is generated. Remember to copy and save it.

Now the generated token with your username needs to be passed to the credential window that popped up in Eclipse.

After successful login, the committed code will be pushed to remote.


Thanks for reading.