
Git Tutorial 11 – Git Pull – Download And Merge Changes From Remote Repository
Introduction
As a part of GIT Tutorials End To End, we will learn about another frequently used and important git command “git pull“ in this post.
Prerequisite posts
I will expect that you are aware of the basic concepts and commands of GIT. But if you are a beginner in GIT then I strongly recommend you to refer GIT Basic Commands and Concepts section on my blog first.
Did you know that I have started a YouTube channel as well and I need your support to make it successful. Please do watch content then comment, like, share, and obviously subscribe.
What is Git Pull command?
In real-time more than one developer will be working on the same repository. Suppose there are two developers in a project – DevA and DevB who have the same code base. DevA developed a feature in his local repository and push those new codes to the remote repository. DevB wants those changes in his local repository. DevB can use the “git pull” command for this.
The “git pull” command downloads and merge contents from a remote repository into the local repository to match the content. If you have referred “git fetch” tutorial then you can understand that the “git fetch” only downloads contents while the “git pull” command downloads and merge contents. In the “git fetch” tutorial, I explicitly merged the content using the git merge command. The git pull command is a combination of “git fetch” and “git merge” commands. In fact, the “git pull” command uses “git fetch” and “git merge” commands.
I will demonstrate the git pull command with an example now.
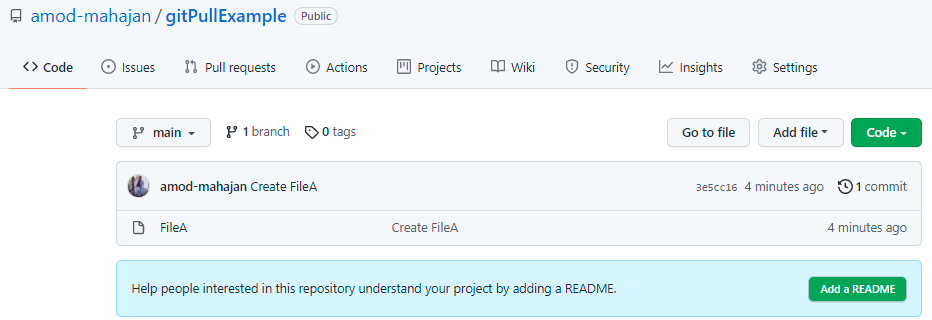
We will use a public demo repository from my GitHub.
Repository link – https://github.com/amod-mahajan/gitPullExample.git
This repo has one commit and one file.
Steps to perform to understand git pul command
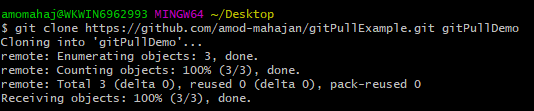
- Clone the above repository in your local. I have already covered “git clone” command in detail here.
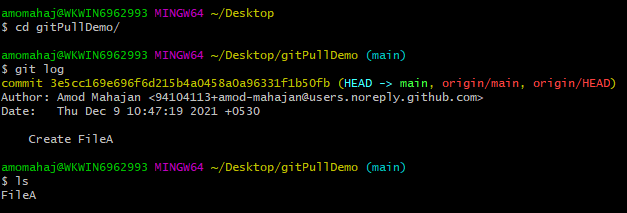
2. Run “git log” command to view existing commits. We should also check existing files. You can go to the folder (gitPullDemo in my case) in the file directory as well to check the content.
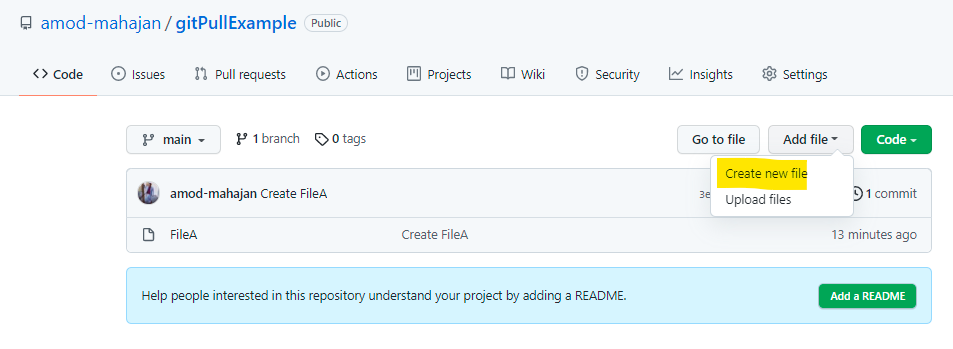
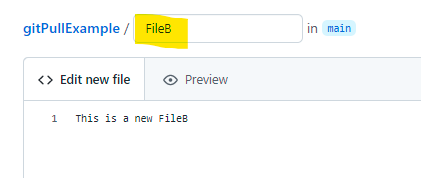
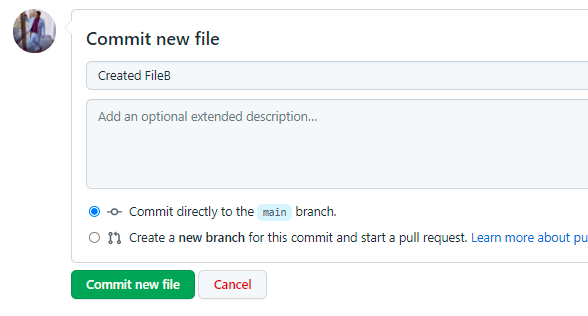
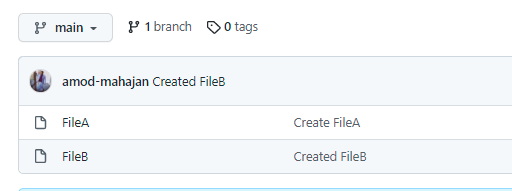
3. Now we have cloned the repo in our local. Let’s add a new file in the repo directly using GitHub. Follow the steps shown below to add and commit a new file. It is similar to the scenario above in which DevA pushes a new feature to the remote repository.
4. This newly added file will not be available to my locally cloned repository. Now run the “git pull origin main” command. This command says that pull the content from the “main” branch in the “origin” repo.
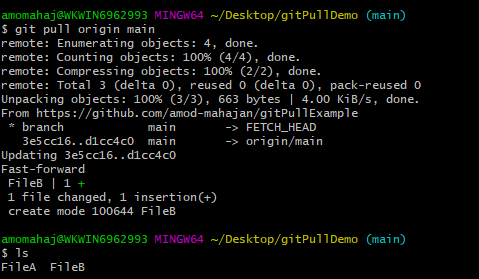
As the “git pull” command fetches and merges, we can see the newly added file named “FileB” in my local repo.
5. You can see pulled commits using the “git log” command.

Please subscribe to my YouTube channel Retarget Common to learn from my video tutorials.
Below are important end to end tutorials for Testers:-
If you have any doubt, feel free to comment below.
If you like my posts, please like, comment, share and subscribe.
#ThanksForReading
#HappyLearning
Great content! Keep up the good work!